¶ Creating Custom Stages for SynthRiders
Started by C.Taylor, [email protected], Anartist-dby on Sythriderz Discord. Adapted for the wiki by lapricap.
This tutorial only covers the basics of the basic two stages: standard and spin It does not cover custom experiences at all. Advanced topics are not covered either.
The methods here are the same for PCVR and Quest cutom stages, To complete this tutorial you need a specific version of Unity You'll need Unity 2019.4.21f1 installed. To dev PCVR you will need the windows SDK and Visual Studio, which Unity will download and install for you if you choose to build for windows at the first install of the engine.
So lets look at the SynthRiders-CustomStages-master project in the Unity hub Copy the extracted folder from SynthRiders-CustomStages-master.zip you got on github to your Unity Projects folder.
Now I assume you are going to want to get or make your own custom skybox, and I will explain how, so also move the files starting with Fluffball in \Unity_Projects\SynthRiders-CustomStages-master\Assets\_CustomStageElements\Textures
Don’t remove the platform colour or your platform will be invisible.
Since we are not going to make a custom Stage Experience we HAVE to remove two more files.
Delete the Timeline folder, removing MAIN.playable and its .meta file. In Prefabs, delete Timeline.prefab and its Timeline.prefab.meta file.
Now when we open the project in Unity it will take less than a minute.
At this point, zip up the project with a new name and save it as “synthriders_template_bkp.zip” or some other name. Anytime you mess up the project you can replace it with this version. If you have several custom stages you wish to build, unzip this folder over and over and give the top folder different names. Unity uses the folder name to make the project name.
In Unity Hub, choose the “add” option to find and select the SynthRiders-CustomStages-master folder inside Projects. You should see this. Open the project
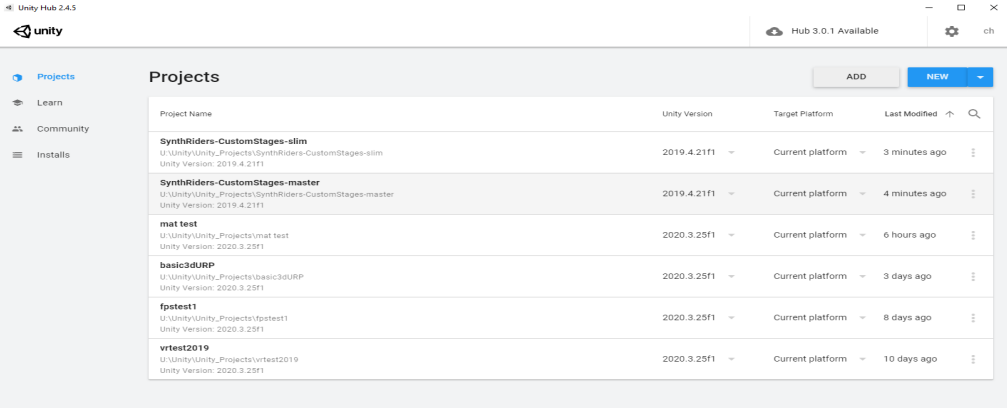
If you don’t have the right Unity version installed it will prompt you. So install it.
Once it opens we have to open the “DemoScene” folder and open the Demo Scene.
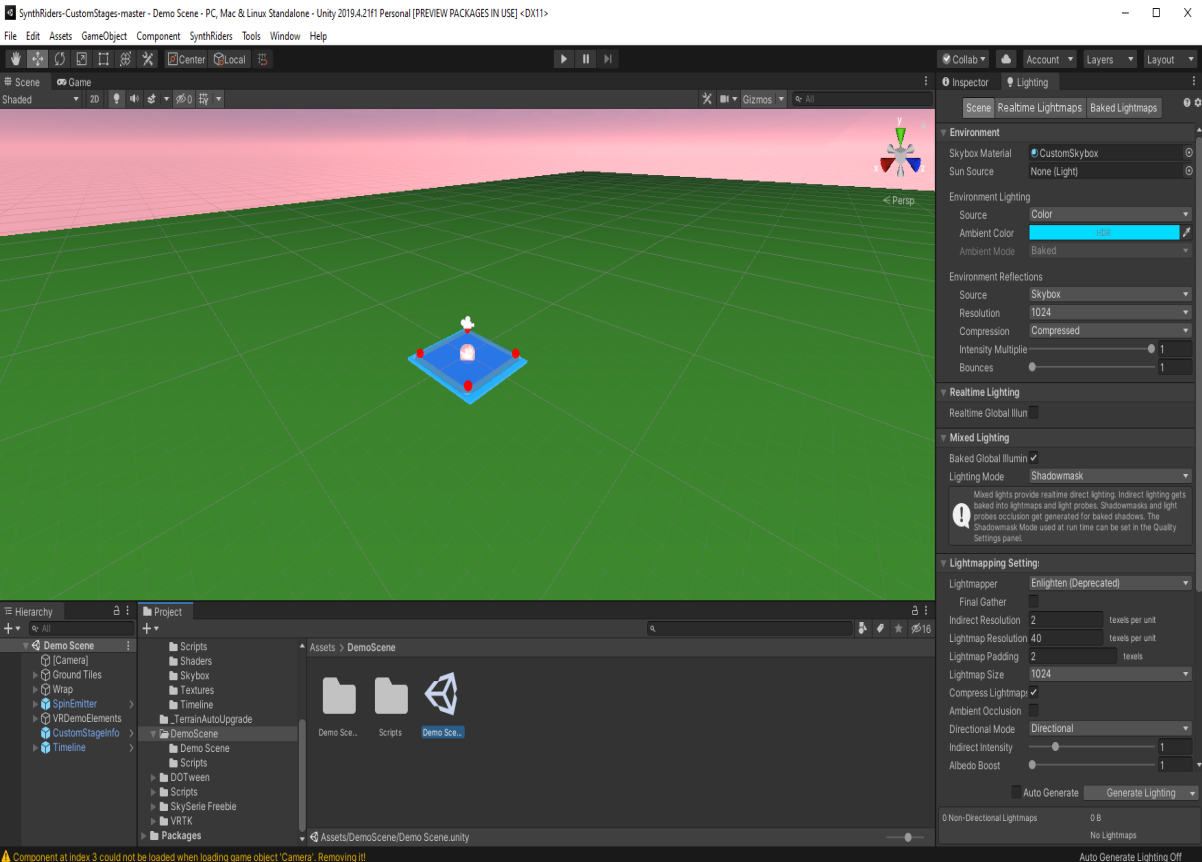
When Unity opens the scene we are looking at the project from the side Double-click the the camera or the “platform” prefab under Demo Scene -> Wrap and you will zoom to the platform. Double clicking the camera or the platform prefab will center your view when you get lost. Clicking the camera to select it gives you a white cone image that shows which direction the camera is pointing.
The camera is the player and should not be moved or animated. The platform can be replaced with your own textured mesh later.
Basic viewport navigation in Unity is to right click and hold in the viewport to rotate your view, while holding the right mouse you can also use WASD + E & Q to move around the scene. Middle mouse drags the scene around without rotating. Left clicking selects.
A Prefab is a blue object in the hierarchy. Pressing the tiny arrow beside the prefab opens the prefab. Each prefab is it’s own object and everything in it moves together, although you can have animated objects, particles, lights moving of their own in the Prefab, they will still move as a separate scene together in the Stage if the prefab is translated (moved) in the scene.
The three tilewrap objects in the hierarchy rotate continuously. Each contains a StageTile prefab. To add your own custom objects and animated meshes and primitives to the moving platform space moving toward the player, they must go inside the tile wraps.
The Player on the Platform is only 2 units wide, so objects even 10 units away are quite far. Objects over 100 units disappear.
This is why its often good to resize the floor tile guide planes in each of the StageTile prefabs from the default of X=400 to X=20.
Do that for all the floor tiles/planes in each of the Stagetile prefabs. Leave the other values. The Z length is the depth of 200, 200 hundred units of stage travel towards the player who is 2 units.
It is actually a very LONG space to fill, and everything that moves over those 200 units should be visible to the player in front of them with minimal side to side. They are busy with Orbs.
The floor plane is usually several feet below the player but that can be changed or you can even delete the floor plane and put something else over the 200 units in its place. It is wise to make a cube or even an “empty” game object at either end of the floor plane on each StageTile and at 0,0,0. Name them and you can double click to jump to them as you build the space allong the Player’s trajectory.
The player can see only about 90 degrees in front, so don’t place any part of a pretty custom mesh platform behind the centerpoint of the camera.
Fbx files can be imported into folders. It is recommended you take meshes you will use into blender/max/maya and export them as proper fbx with face normal smoothing and UV mapping for best results. If you have separate materials use the extract feature of unity in the inspector to extract the texture files into the mesh folder. You can also drag and drop textures into the editor hierarchy and attach them to shader albedo/normal/etc. All objects/meshes you want to be in the scene must reside under the Custom Elements main folder.
Animated Objects can be placed in the StageTile prefabs, but you would have to create your own looping animation controller and extract the different anims like you normally would do in a Unity project. You can put things like trigger boxes on the stage in front of the player to trigger animations provided you don’t add any custom scripting.
Now move yourself around holding right click and using WASD to get yourself behind the platform so you can see what the player sees. You should see the platform in front of you and farther off is the Spin Emitter, a yellow cross and circle. Click the camera to see the cone and it will help you see which way.

There are 3 green StageTile prefabs, and you are in the center of the first one. Each has a 400 unit wide by 200 unit deep rectangular plane.
In a standard Stage the 1st and 2nd tile prefabs move forward towards the player, an invisible object at the end of each tile called the Tile Reset makes the tile drop down as the next one keeps coming, then the first goes behind the second and they repeat until near the end of the song, then the 3rd tile moves forward.
In a Spin Stage only the first TileWrap1 is visible around the player. The other two are not used. When making Spinstages based on a Standard custom Stage, it may be more aesthetically pleasing and fun to make a second version and design them separately as a spinstage to show off all your assets.
The green planes are only guides. They can be deleted. Inside any of the 3 TileWraps you can add and delete objects. Objects can be placed anywhere in the 3d space in the world, only the objects inside the StageTile prefab will move.
The Player is so busy smacking little Orbs flying at them that they will not see things at the edge of the 200 unit field. The Player is only 2 units. If you put things too far they are backgound. The Player is focused on a 20 degree field in front of themselves mostly. So the things that have the most effect are far things that are scaled large and things around the user within 30 units on each side of the user or tunnels that are 10 units on each side.
Go to The Project window and select the Defaultfloor material in the Materials folder. In the Inspector on the right, change the colour from green and slide the A (alpha) slider halfway to make the floor semi transparent so we’ll be able to see the skybox through it. You could also change the material to a standard shader and give it an image map at this point if you wanted.
Select the StageTile01 -> floor object in the Hierarchy.
Change its X width in the right hand Inspector to 50 then double click the platform object in the Hierarchy to zoom in on the platform. Now the tile is long and thin like a green road and we can see more of the Skybox which is a dull plain colour at this point.
If you have your own Cubemap, HDRI, or Equirectangular 360 panoramic image, locate it.
Unity will display several types of Skybox texture that are common in 3d applications. The two main ones are the Cubemap and the Equirectanular Panorama.
A Cubemap is made of 6 images that map onto a huge cube around the scene. When placed in a single image they look like this.
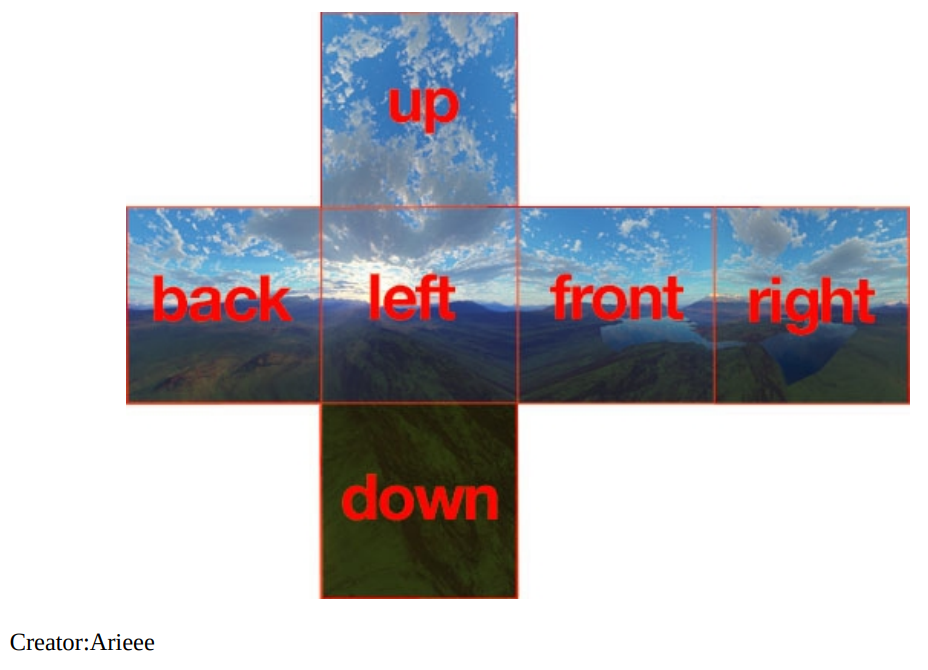
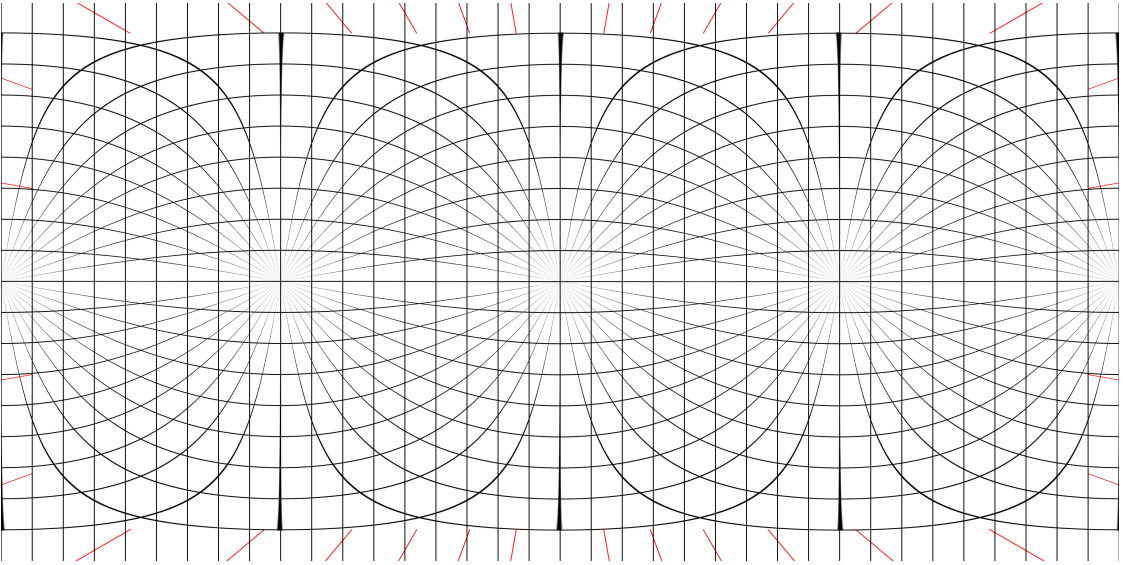
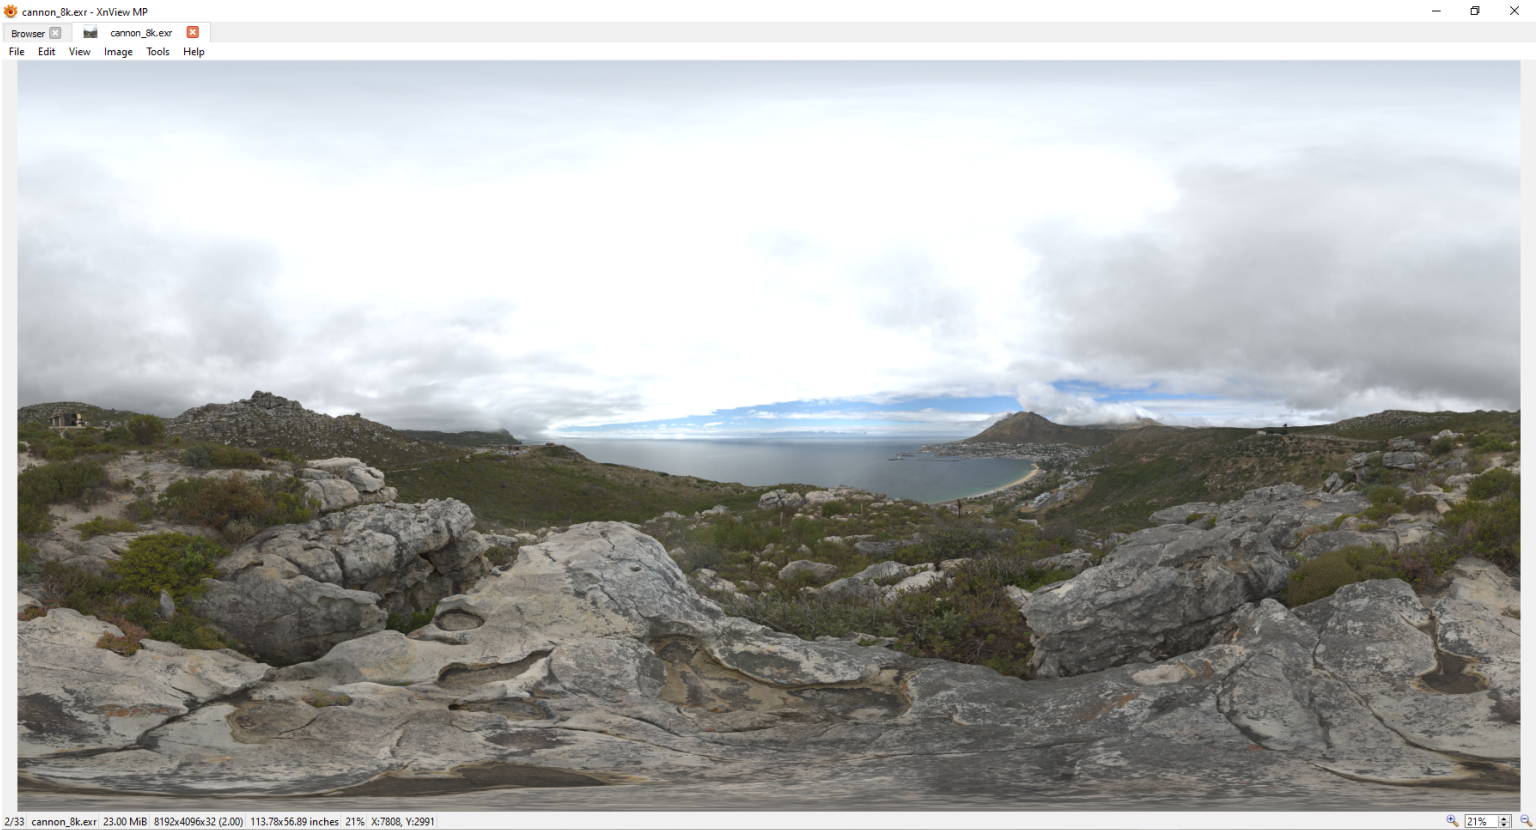
The other type of Skybox texture is an Equirectangular panorama which is distorted and designed to map onto a huge sphere surrounding the scene. This is the common distorted image from single hdri images.
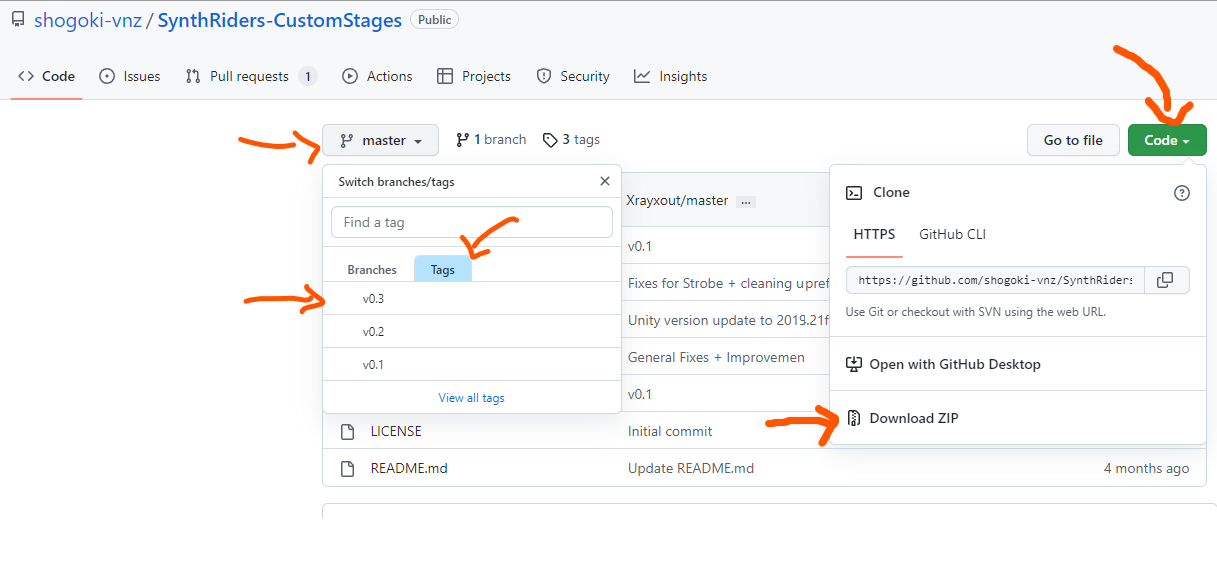
Some of the items here reference an older version of the SynthRiders-CustomStages template on github. Click master, go to tags, select v0.3. Then go to the code button and download the zip to get the “Freebi HDRI" folder referenced.
Go into the “Freebi HDRI” folder (this can be gotten from earlier versions of the stage template on Unity) and look for a .hdr file that is one file, as you can see some of them are cubemaps and have 6 images for the skybox, but we want a single image one for now. I chose the “SkyhighFluffycloudField4k” Drop it into the Skybox folder in your Unity project by dragging and dropping it there in the Unity interface. In the Skybox folder in unity, select the CustomSkybox In the top right inspector, change the Shader type to Skybox->Panorama Grab the .hdr file that you imported to the Skybox folder and drag it over the square texture slot on the right where it says Spherical (hdr).
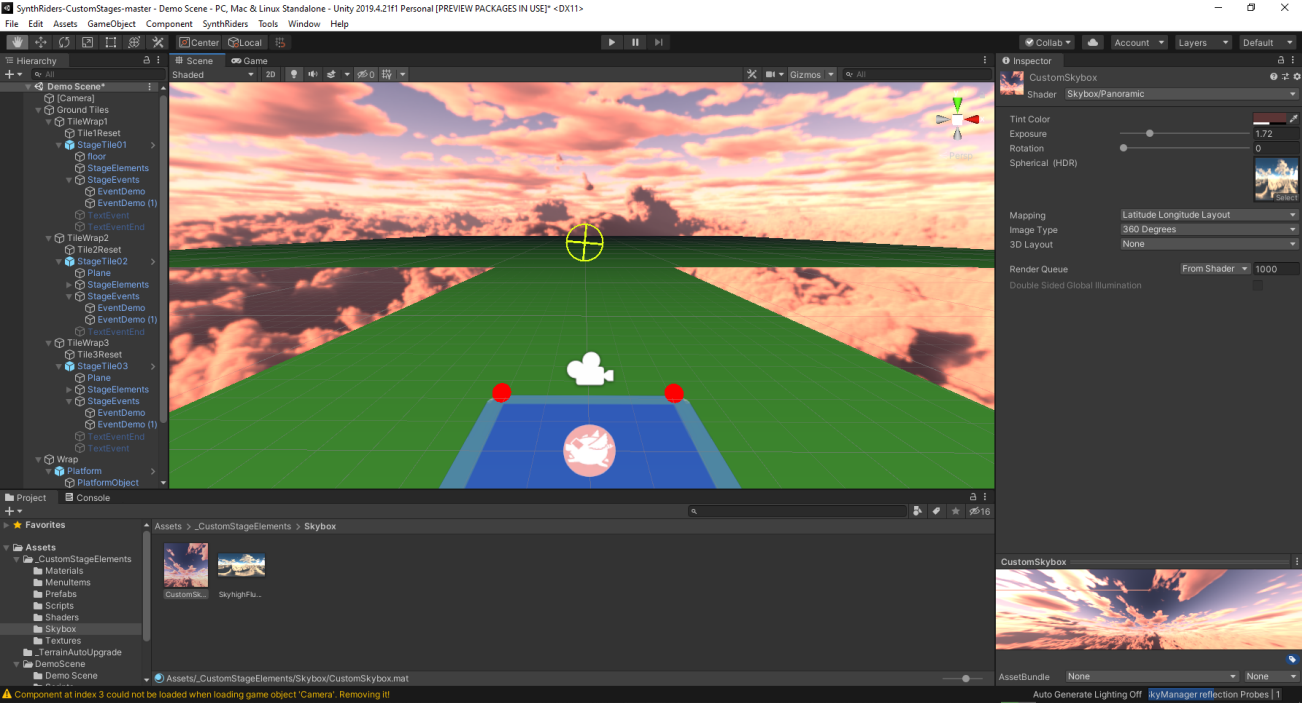
Now we have a different environment.
When you have finally decided on the environment we should “bake” the skybox into the reflection probe. This is just to fill the reflection object used for shiny reflections. It is already set up in the scene and we do not need to do hardly anything. Open the Lighting window under Window->Rendering->Lighting.
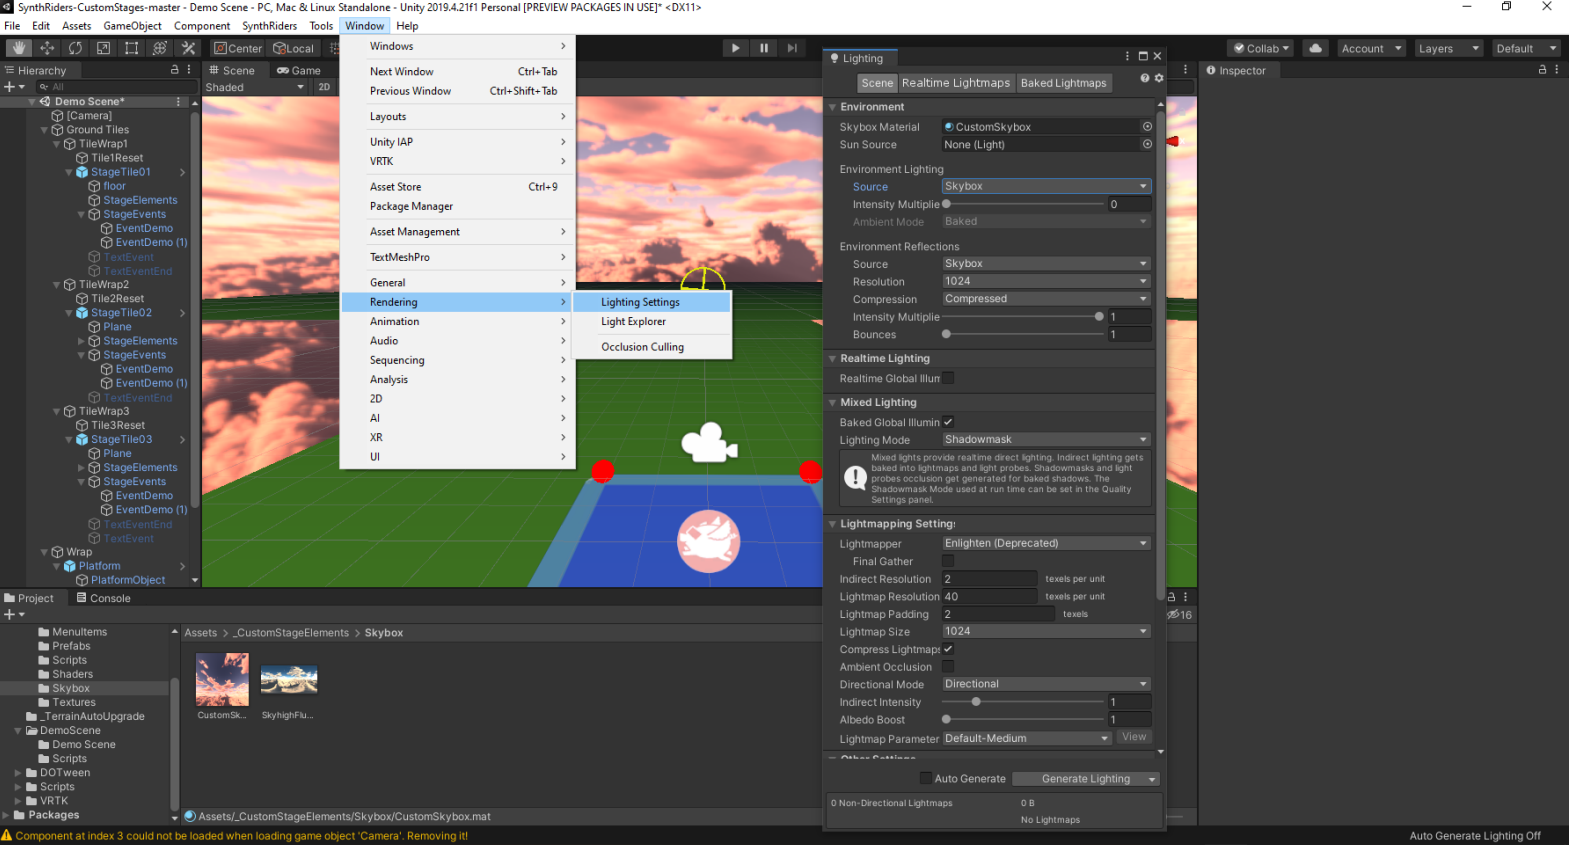
Where it says “Environmental Lighting” change “Source” to Skybox To see what happens, click the Demo Scene folder underneath the main Demo Scene folder You will see a “LightingData” and a “ReflectionProbe-0” You should still have the Lighting window open (you can drag the tab beside the inspector tab if you always want to have it there) Click “Generate Lighting” and it will fill the reflection probe with the skybox image and you should see it change. At this point we are done with the lighting tab.
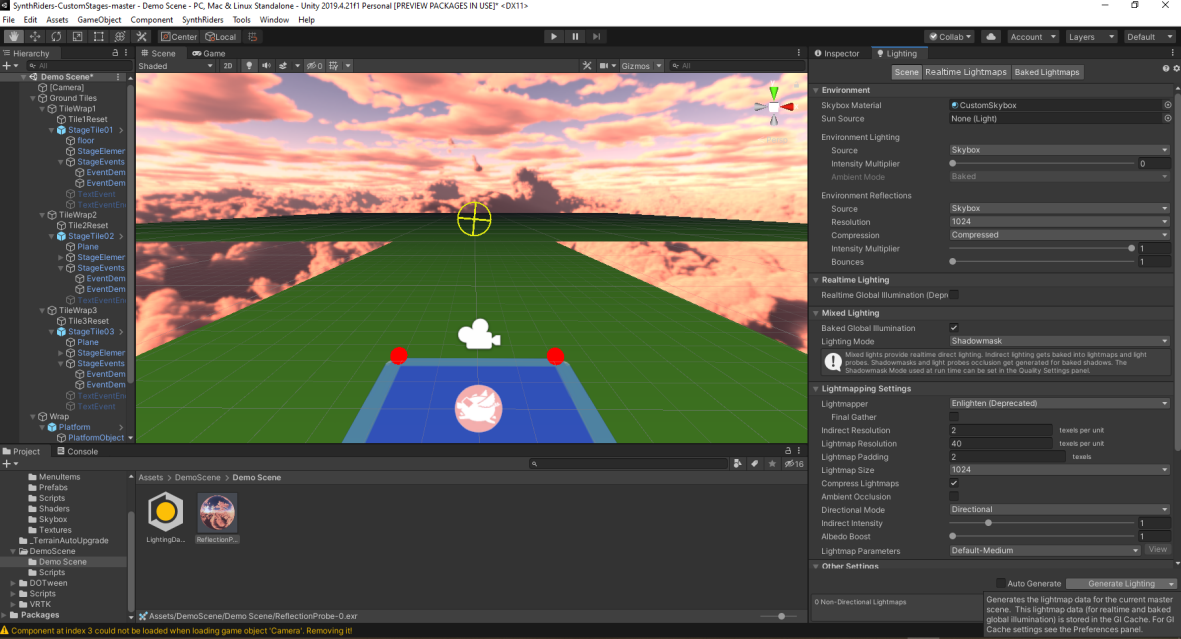
Now lets change the color of the green floor objects. Go to materials and choose the DefaultFloor material. On the right in the inspector change type of Shader to Standard and change the Rendering Mode to Transparent, then change the colour from green and drag the A(alpha) value down a bit. You could also drag a tileable image onto the square named Albedo if you wanted. You can also try an Unlit Shader or other shader.
You can now change the material for the Platform, note that it is just a plane and four spheres you can open the prefab by double clicking and you can change the mesh of the platform object in the right hand inspector. At this point if you have added your own fbx object to the Custom Stage Elements folder you could change the mesh from Cube to your fbx mesh.
You don’t want to make the custom platform too dense as a mesh, but Unity supports normal maps, so you can make a low poly platform look like its a high poly model with a good normal map.
Anything that you put in the Platform prefab moves with the player. You could build a whole spaceship around the player or a detailed platform, but every poly counts especially if you are building for Quest machines which don’t have as powerful of a GPU.
The 4 spheres change color during certain events. You can delete, move, change their mesh. The material on them changes colour if you don’t change the material. That is a detail we will go into again later in the document, the strobe effect and material change. This colour change is a property of the particular material and is useful.
Objects that you want to add to your stage that aren’t Unity primitives should be imported as fbx and the mesh and its associated textures has to be inside the custom stage elements folder for it to be exported to your stage. If you import a mesh with embedded textures you need to extract the materials using the inspector tab.
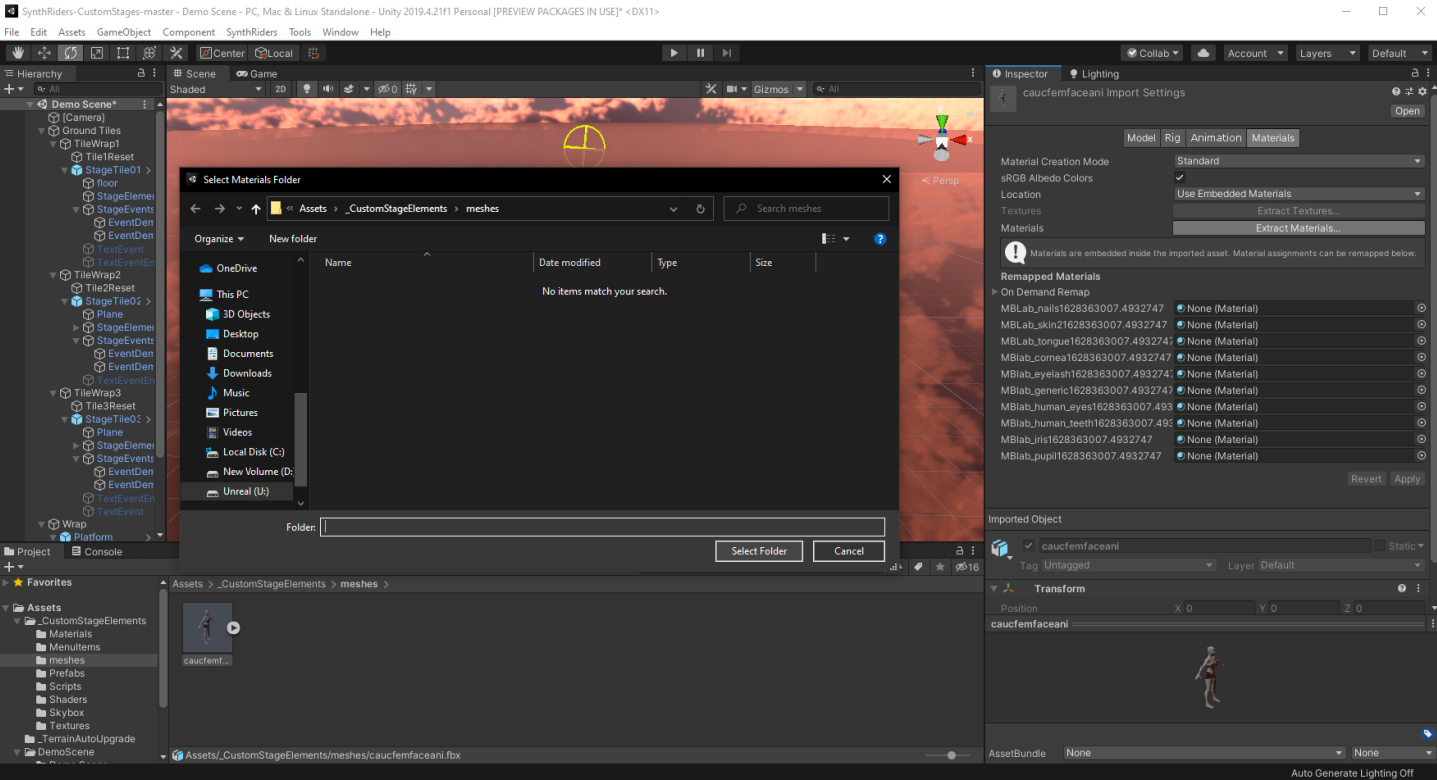
Some of your meshes might look black at this point. If you change their shaders to “unlit” and rebuild they will show up, but that’s not ideal, so we need to go over the lighting and materials next.
It is good to put a directional light into your level, usually near the paltform, but not necessarily inside the platform prefab.
If you put lights on any of the Stage tiles, they will move and must be dynamic lighting directional, not baked. Lights placed outsde the prefabs in the main open environment can be baked if the obects in the environment are not animated.
A directional light inside the Platform prefab will make sure everything is visible. The platform can hold particles, custom meshes, lights, even animations.
Emissive, unlit, solid shaders on objects are common in the game. Standard shaders react to lighting, so if you use standard shaders you must have a light on them. Standard shaders with normal maps can make simple geometry look very dense in detail, but they need good lighting.
Skybox intesity can be adjusted. Rebake the global illumination reflection probe if you change it or change the HDR.
The StageTile prefabs can hold objects, lights, and particle systems, but remember if you throw everything plus the sink in only those with gaming rigs will be able to play it.
Don’t use Heightmaps for details. Convert them to Normal maps using Njob, Xnormal or Materialize(bounding box software). You will get much nicer details on low poly geometry using normal maps. I suggest Materialize. You can import a greyscale heightmap and convert it to a Normal map using a bunch of parameters. http://www.boundingboxsoftware.com/materialize/downloads.php
At this point you could test your level. Put at least a couple of primitives in each stage tile, close to the center of the x axis in the scene so they fly by the player. Make sure they aren’t too high or low, use the location fields in the inspector to snap them to near 0 on the z axis.
Open the CustomStageInfo and in the inspector change the map name and author which will be visible in Synthriders. Delete the Experience field completely since we aren’t making an Experience map.
At the top of the menu in unity choose Synthriders->Export StageBundle In the menu that pops up change the filename, and choose whether it is a Spinstage or not Click Export for the platform you are building for, and wait. When it is done a folder will pop up in explorer. Copy the .spinstage file over to your custom stages folder in the Synthriders program directory.
Start the game and when you choose a stage at the end of the paid stages, your custom stage should appear under the name you put in the StageInfo prefab.